If you have a GMC Sierra truck, you may have noticed that the front end sits lower than the rear. This is called a rake, designed to improve the aerodynamics and fuel efficiency of the vehicle. However, some truck owners prefer a more level stance, which can also enhance the off-road performance and appearance of the car. That’s where a leveling kit comes in.
A leveling kit is a device that raises the front of your car to make it more level with the rear. A GMC Sierra is a full-size pickup truck in production since 1998. It is famous for its reliability, durability, and versatility. It offers various features and specifications, including engine options, cab sizes, bed lengths, trim levels, and towing capacities. GMC Sierra leveling kit can enhance the look and performance of your GMC Sierra by allowing you to fit larger tires, increase ground clearance, and reduce body roll.
Continue reading as we discuss the ups and downs of installing a leveling kit on your GMC Sierra and provide some tips and recommendations for choosing and installing a leveling kit on your truck.
GMC Sierra leveling Kit Installation Process
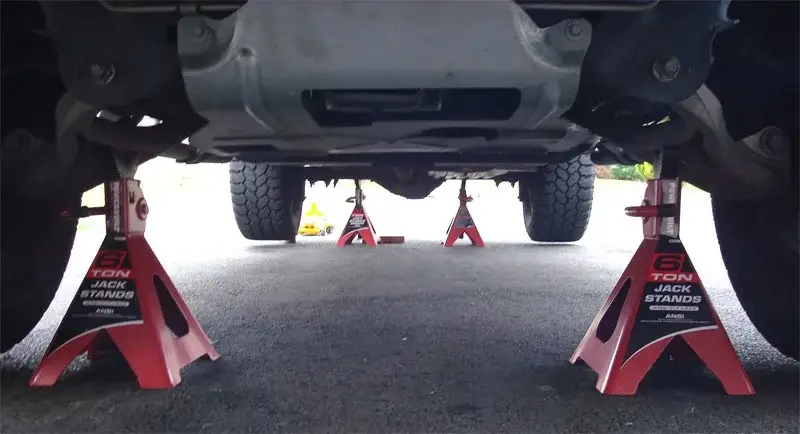
Installing a leveling kit on a GMC Sierra may differ per the type and model of the kit, as well as the year and trim of the truck. However, a common type of leveling kit is a spacer between the lower strut mount and the lower control arm. This type of kit can be installed without disassembling the strut, which makes it easier and faster. Here are some general steps for installing this type of leveling kit on a GMC Sierra:
- Park the vehicle on some level ground and apply the parking brake. Loosen lug nuts on the front wheels, but do not remove them yet.
- Lift the vehicle’s front using a jack and support it with jack stands. Take away the front wheels and set them aside.
- Remove the six bolts holding the factory skid plate (if equipped) and remove the skid plate.
- Remove the upper ball joint nut using an 18 mm wrench and separate the upper control arm from the steering knuckle with a pickle fork or a ball joint separator tool.
- Remove the nut from the steering linkage using an 18 mm wrench and separate it from the steering knuckle with a pickle fork or a tie rod end separator tool.
- Remove the sway bar link nut using an 18 mm wrench and separate it from the lower control arm with a pickle fork or a pry bar.
- Remove the three nuts holding the upper strut mount to the frame using a 15 mm wrench.
- Remove the lower strut mount bolt using an 18 mm wrench and socket.
- Carefully lower the strut assembly and slide it out of the lower control arm.
- Install the spacer on top of the lower strut mount using the supplied hardware. Ensure to align the holes correctly and tighten the bolts to 37 ft-lbs.
- Reinstall the strut assembly into the lower control arm and secure it with the factory bolt. Tighten it to 192 ft-lbs.
- Reinstall the upper strut mount to the frame and secure it with the factory nuts. Tighten them to 37 ft-lbs.
- Reconnect the sway bar link to the lower control arm and secure it with the factory nut. Tighten it to 48 ft-lbs.
- Reconnect the steering linkage to the steering knuckle and secure it with the factory nut. Tighten it to 46 ft-lbs.
- Reconnect the upper control arm to the steering knuckle and secure it with the factory nut. Tighten it to 74 ft-lbs.
- Redo this process for the other side of your truck.
- Reinstall the skid plate (if equipped) and secure it with the factory bolts. Tighten them to 15 ft-lbs.
- Reinstall the front wheels and tighten the lug nuts in a star pattern to 140 ft-lbs.
- Lower the truck and remove the jack stands.
- Check for any clearance issues or interference between any components.
- Have an alignment done by a professional shop.
Note: These steps may not apply to every situation. Always follow the instructions on your leveling kit and consult a qualified mechanic if you are unsure about any stage.
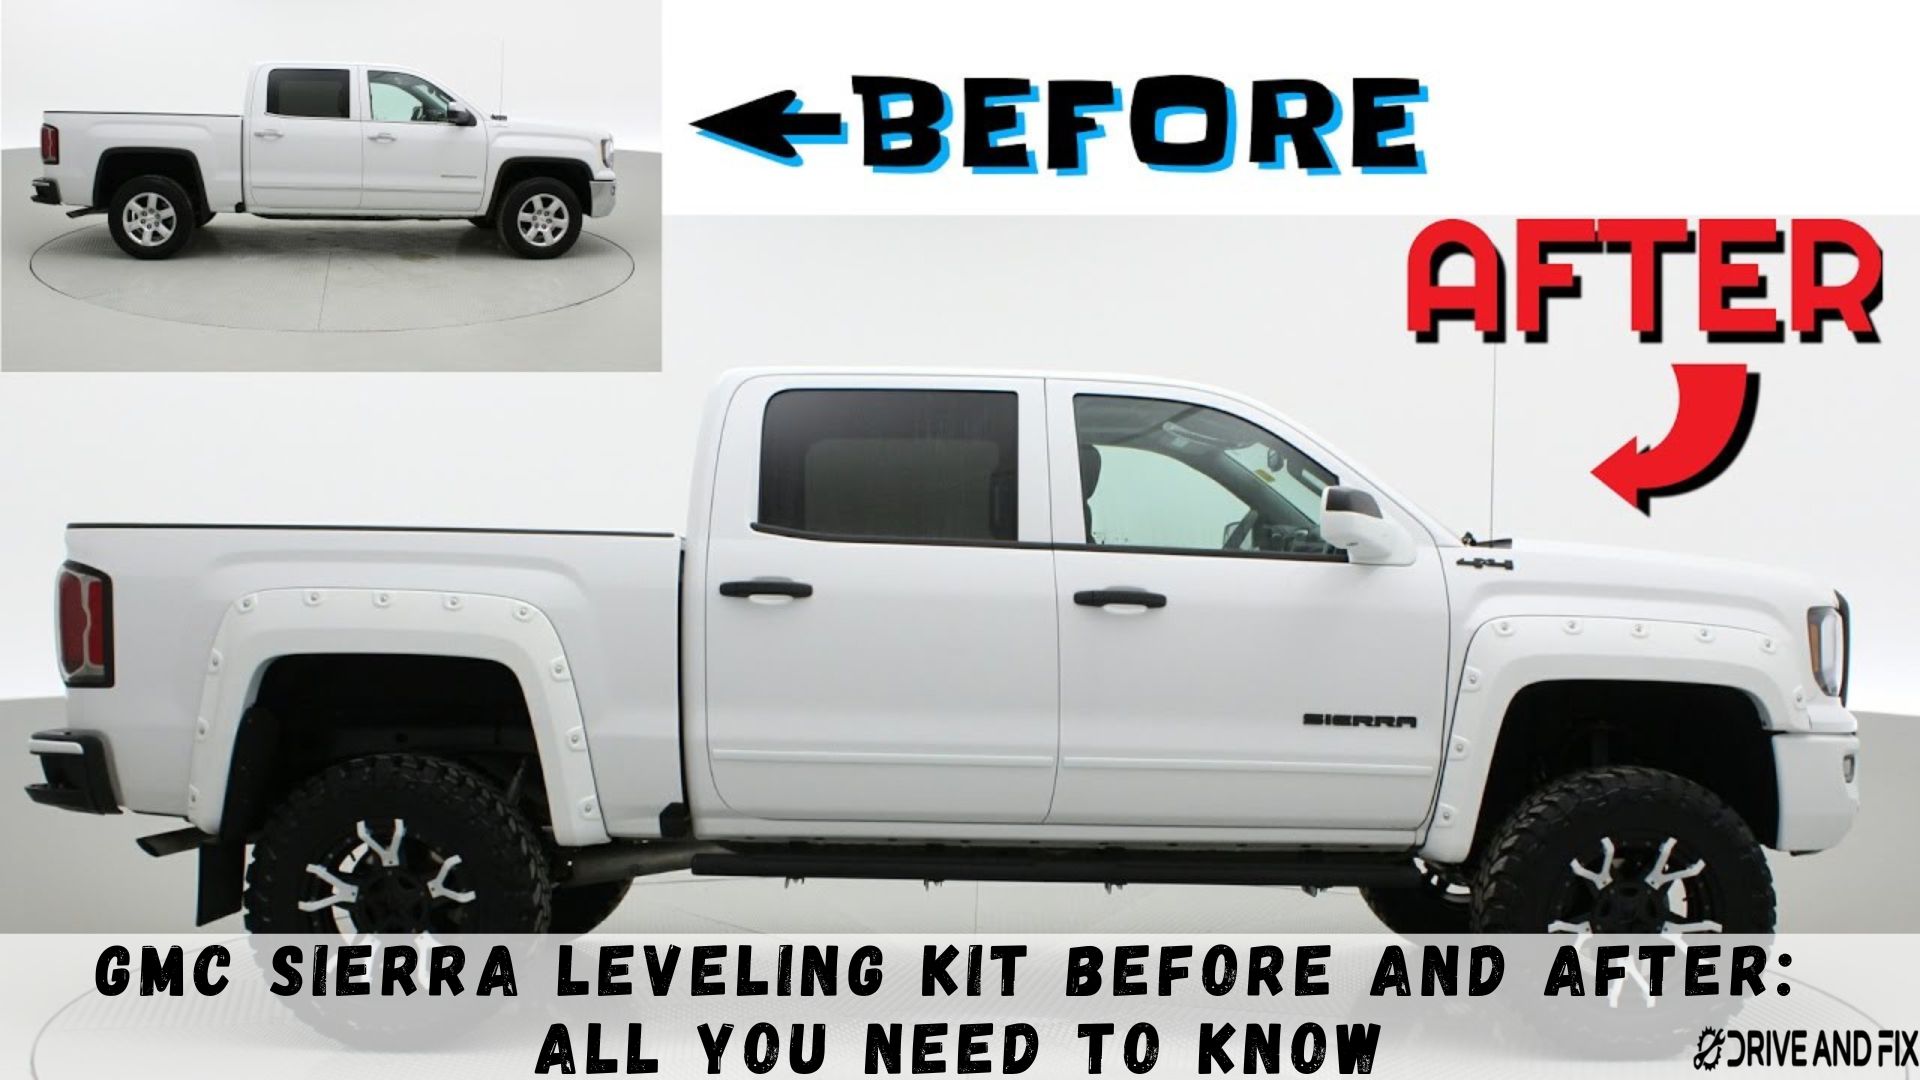
GMC Sierra Levelling Kit Before and After
Differences
A leveling kit makes a significant difference in the appearance and performance of your GMC Sierra truck. Look at some of the main differences you can notice before and after installing a leveling kit:
- Stance:
A leveling kit makes your truck more level by raising the front end to match the rear end. This helps to eliminate the factory rake that makes your truck look nose-down. A more level stance can give your truck a more aggressive and balanced look.
- Clearance
It can increase your truck’s ground clearance and body protection by lifting it higher off the ground. That helps you avoid scraping or damaging your truck on rough terrain or obstacles. More ground clearance can also improve your off-road performance and capability.
- Tire size
Allows you to fit larger tires on your truck by creating more space in the wheel wells. Larger tires can improve your traction and stability on different surfaces and enhance your truck’s look. However, larger tires can also increase your truck’s weight and drag, reducing your fuel efficiency and ride quality.
Pictures
Here are some before and after pictures of GMC Sierra trucks with leveling kits:
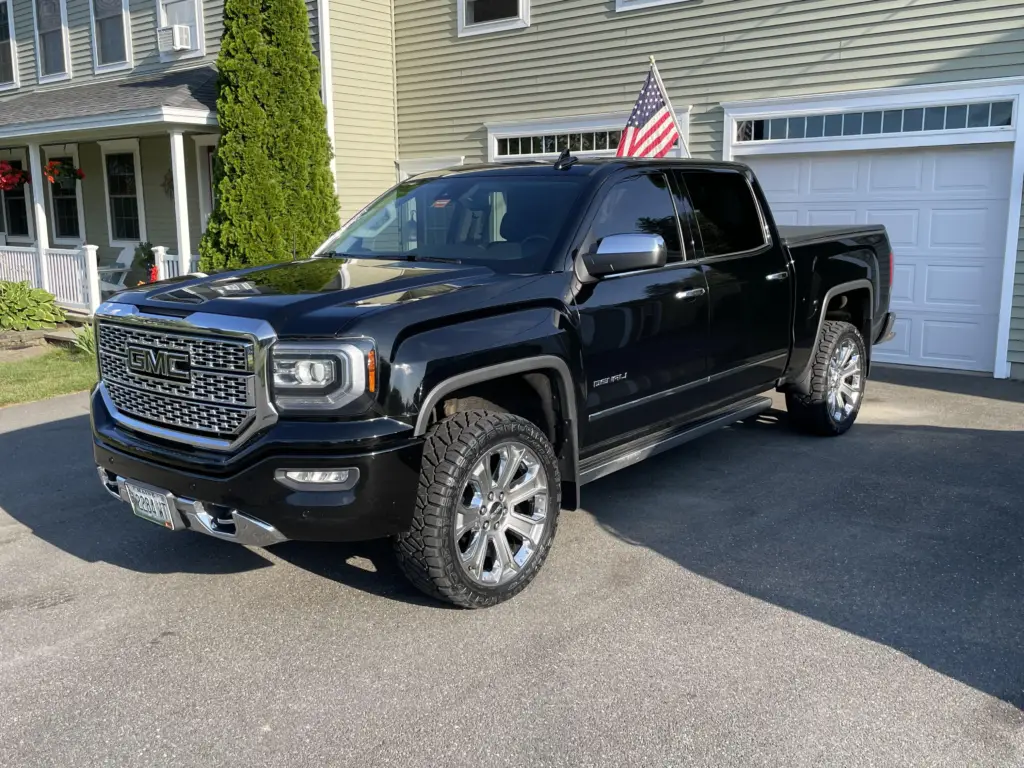
Before: 2019 GMC Sierra Denali stock
After: 2019 GMC Sierra Denali with 2.5-inch front leveling kit and 1.5-inch rear block kit
Ups and Downs of Installing a Leveling Kit Gmc Sierra
Installing a leveling kit on your GMC Sierra can positively and negatively impact your truck. Consider these factors before making your decision:
Ups
- Improved appearance:
The leveling kit can make your truck look more aggressive and balanced by eliminating the factory rake and allowing for larger tires. Some people prefer this style over the stock look of the GMC Sierra.
- Enhanced off-road performance:
A leveling kit can increase your truck’s ground clearance and body protection, which can help you navigate rough terrain and avoid obstacles. You can also fit bigger tires that can improve traction and stability off-road.
- Cost-effective and easy to install
The kit is usually cheaper and simpler to install than a lift kit, which can require more modifications and components. You can install it with basic tools and skills in a few hours and may not need an alignment afterward.
Downs
- Cost of installation and maintenance
You may still require some expenses for installation, such as labor fees, alignment costs, or additional parts. You may also need to maintain your truck more frequently, such as checking the tire pressure, rotating the tires, or replacing the shocks.
- Risk of decreased fuel efficiency:
You could increase the drag and weight of your truck, which can reduce its fuel economy. This effect can be more noticeable if you install larger tires that increase the rolling resistance and change the gear ratio.
- Possibility of reduced ride quality:
A leveling kit can alter your truck’s suspension geometry and spring rate, affecting its ride comfort and handling. You may experience more bumps, vibrations, or noise on the road, especially at higher speeds or uneven surfaces.
- Warranty concerns:
It can void your factory warranty if it causes damage to your truck or affects its performance. Before installing a leveling kit, check with your dealer or manufacturer to ensure it does not affect your warranty coverage.
FAQS
What are the Various types of leveling kits and how do they work?
Different leveling kits exist, such as spacers, blocks, torsion keys, or coilovers. Spacers are the most common type of leveling kit, and they go between the lower strut mount and the lower control arm. Blocks are similar to spacers but go between the leaf spring and the axle. Torsion keys are used to adjust the torsion bars that control the height of the front suspension. Coilovers are complete replacement units that replace the factory struts and springs.
What is a leveling kit, and why do I need one for my GMC Sierra?
A leveling kit is a device that raises the front of your truck to make it more level with the rear. This can improve the appearance and performance of your truck, as well as allow for larger tires. A leveling kit can also eliminate the factory rake that makes your truck look nose-down.
How much does a leveling kit cost, and where can I buy one for my GMC Sierra?
The cost of a leveling kit may vary depending on brand and model, but generally, it ranges from $50 to $300. You can buy a leveling kit online or at a local auto parts store. Some popular leveling kits for GMC Sierra trucks are Rough Country 23, SuspensionMAXX 1, ReadyLift, MotoFab, MaxTrac, etc.
Verdict
Leveling kits are a popular and affordable method to enhance the look and performance of your GMC Sierra truck. Notice, the GMC Sierra leveling kit before and after differences, by raising the front of your truck to match the rear, you can eliminate the factory rake, increase the ground clearance, and fit larger tires. Nonetheless, you must know the potential drawbacks of installing a leveling kit, such as reduced fuel efficiency, ride quality, and warranty coverage. Before you decide to install a leveling kit on your GMC Sierra, research and compare the different types and models of leveling kits available. You should also follow the instructions and tips for properly installing and maintaining your leveling kit.
